Saturday, July 15, 2017

Geometric Beach Blue Medallion Wall Art

Layers of paint,

line repetition, 

and 

grunge texture

come together

on this beach blue medallion.


It would make fun wall art for any room in your home.

Here are the details:

I am using a 24" square of plywood.

Base paint with brown,

then while still wet add a mix of white, grey, and camel.


Let dry.

Cover with random brush strokes

of aqua and camel.

I also mixed a darker blue with some black  to get a grey hue

then added some white.

Lots of white.

So I dip half of my brush in white and half in blue

and keep applying in random

crisscross action.


Let dry.

Mark the center of the board.

Use a round template (bowl) as a guide for circle placement.

Measure in from 4 sides to make sure they are equal.

My bowl was about 12 or 13" diameter.

I used  the end of a marker to dip and paint my dots.


Your center should be marked with pencil.

Use a yardstick as a guide.

Fold a 2.5" square of cardstock in half.

Dip folded edge into white paint.

Drag along edge of yardstick to make center cross lines.


Cut a strip of cardstock 1/2" wide and about 5" long.

Use this as a guide for arrow like lines inside circle.

Use a small piece of folded cardstock 

to drag along guide making lines.


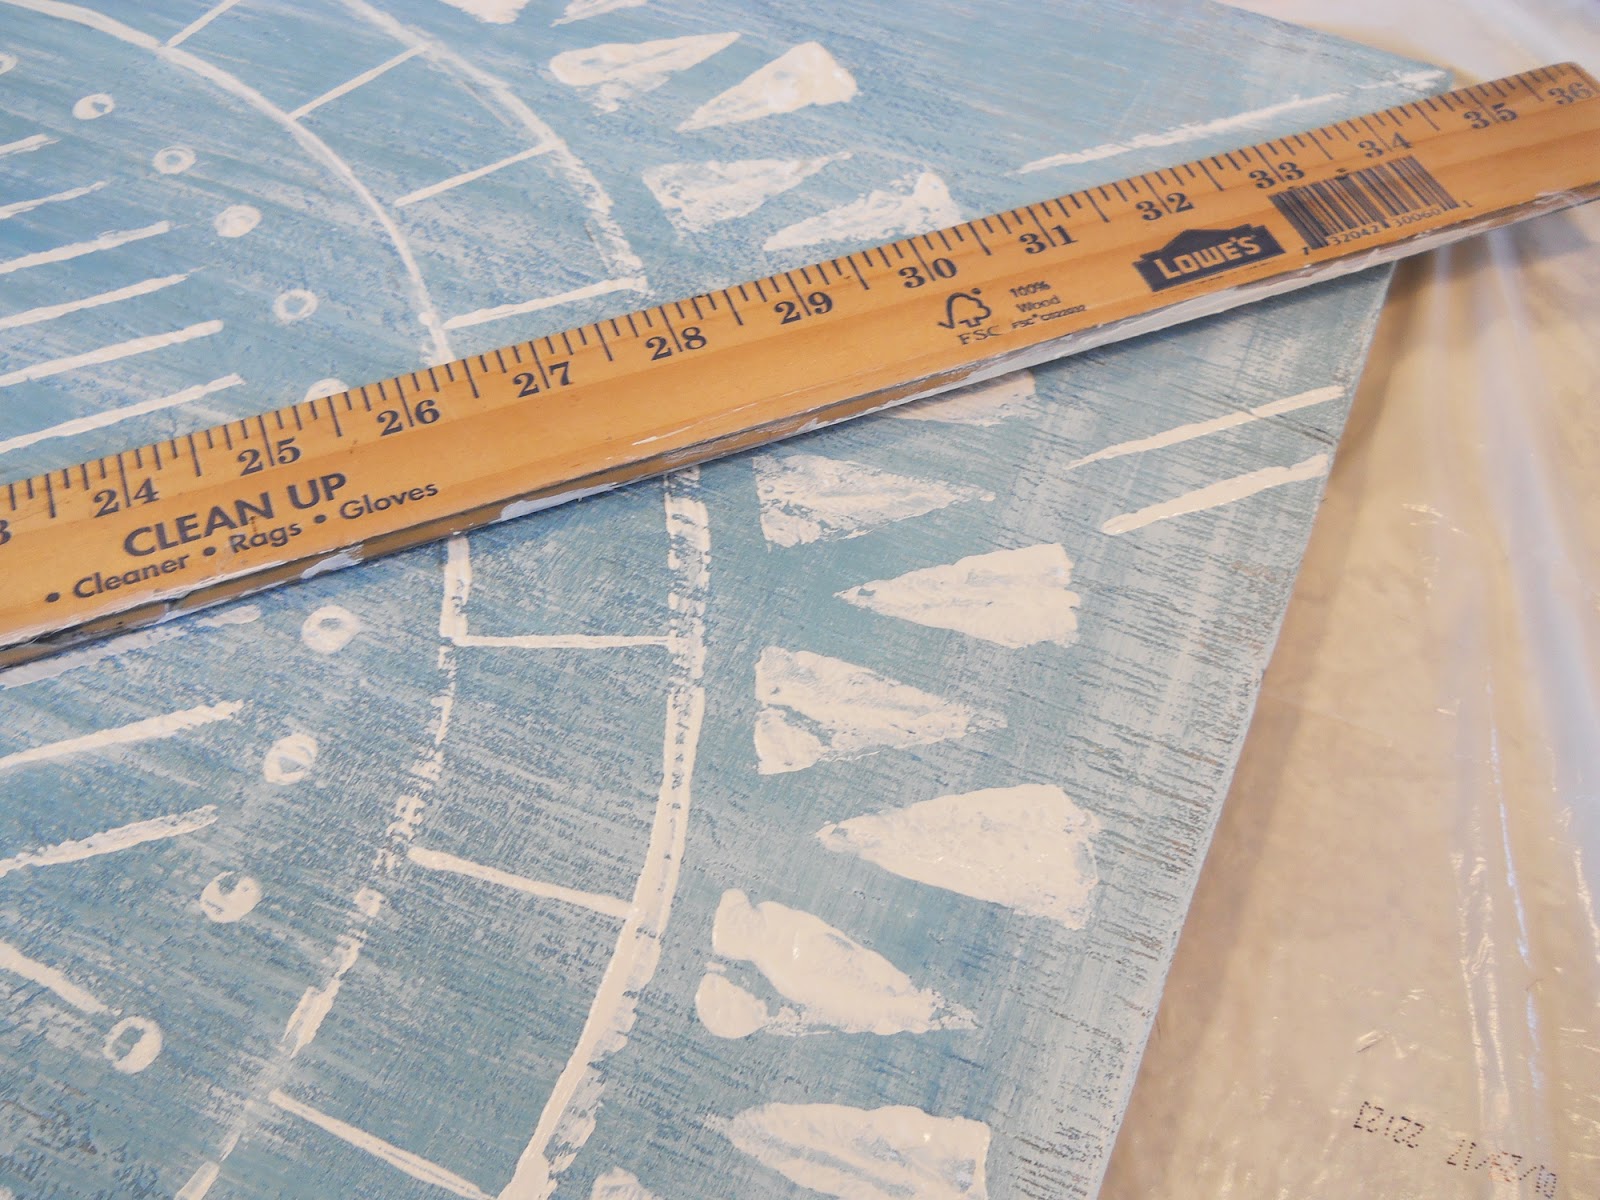
Now measure out from the center

and make pencil marks for a circle.

Pull your folded cardstock around on it's side

to make a rough textured line.


Further out from center,

mark another line 

and make the same kind of circle.

Then create connecting lines in between.


Make a triangle stamp.

You could cut a sponge or use a potato.

I used cardstock.


Dip in paint

and place around edge of circle.


Using yardstick, extend the arrow lines to outside corners.


You could leave just like this,

or you can sand for a more worn look.


After I sanded, I wiped the surface with

Early American stain.  

Then I wiped off with paint thinner.

You can skip the stain step if you want it lighter.

I used a brown black paint to rub the edges.


I love the geometric look

of a large tribal stamp.

This would be fun to do in a series of 3.

Use a variety of earthy geometrics and colors.

Maybe add a mint or sage and a sandy tan.

So many ideas!

Hope you try it!

Deb


Sunday, June 18, 2017

How to Make a Framed Canvas Quilt Block-Farmhouse Art

Large Scale

Graphic

Farmhouse

Art!

You can make it for about $15.


It's a simple star quilt block style

that could fit with farmhouse decor.

The black and white would make it a nice modern accent too

because it is so minimal in design.

Of course a black, white, and brown combo 

 is an industrial "go to" as well.

So I think it is a fun and versatile piece of art.


Start with a gallery canvas 22" x 28".

This will be about $10 if you have a coupon

or wait for a half price sale at most art stores.


You will need about 10' length in furring strips.

These are 1" x 2" pine wood.

Cut into 4 pieces.

2 @ 22"

2 @ 29.5"

Stain whatever color you like.

I used Minwax Early American.

Base paint your canvas with a white or off white paint,

matte or satin.  Not glossy.

It's important to base paint first so that you can 

easily touch up any mistakes.

Cut a 7" square template from paper.

Center on your canvas and very lightly trace with pencil or chalk.

You can tape off the edges of the square

to get a precise edge.

Then paint in matte black.


Now fold the paper in half

and then to the center

forming your triangle pattern.

You can either trace this onto your canvas or make a stencil

with cardstock to paint within the guide.


The stencil will make it easier to paint.


Correct any "outside of the lines" paint

with a small brush.


Add more black paint to 

bottom right corners and edges.

This will add a little shadow.

Then sand all of the upper and left edges

to add highlight.


Use a long thin nail to attach the 2 short wood ends first.


Then attach the sides.


I like the sanding detail for extra textural dimension.


It's budget friendly wall art.

Large scale with a graphic impact,

this simple star quilt block style

will warm your walls.


Thanks for your visit!

Deb


Saturday, May 13, 2017

Planked Wood Wall Art - Butterfly

Get ready creative people.

Get a bundle of lath and your wood burner out

and lets make 

a large rustic, wood planked butterfly!


Wouldn't this be a fun piece for your porch or patio area.

It would be so cute in a girl's bedroom.

I have mine in the entry.


Although it looks as if it were cut and pieced,

I actually used my wood burner to get the effect.

I thought it was time saving but achieved the look

I was going for.

I was inspired by Olive and Grain

You should see their beautiful pieced reclaimed work.

I cut a piece of utility panel 30.75" x 48".

I laid out my lath boards and used power grab adhesive.


Put weight on your boards and let dry overnight.


The most time consuming effort 

was in calculating measurements,

and I've done that for you ,

so it should go smooth!


Here are the pattern marks.


Measure in from the sides and mark with chalk.

These are the lines you will use to wood burn.


After the wood burning,

I gave the whole piece a light brown wash.


Now for the fun paint part!

I used greys, blues, off white, ivory,

and even a metallic gold for one board.


You know you want to try it!

I sure hope you do.

It's so good to have your hands busy.

Trying new and different techniques

gets your creativity flowing!

Enjoy,

Deb